

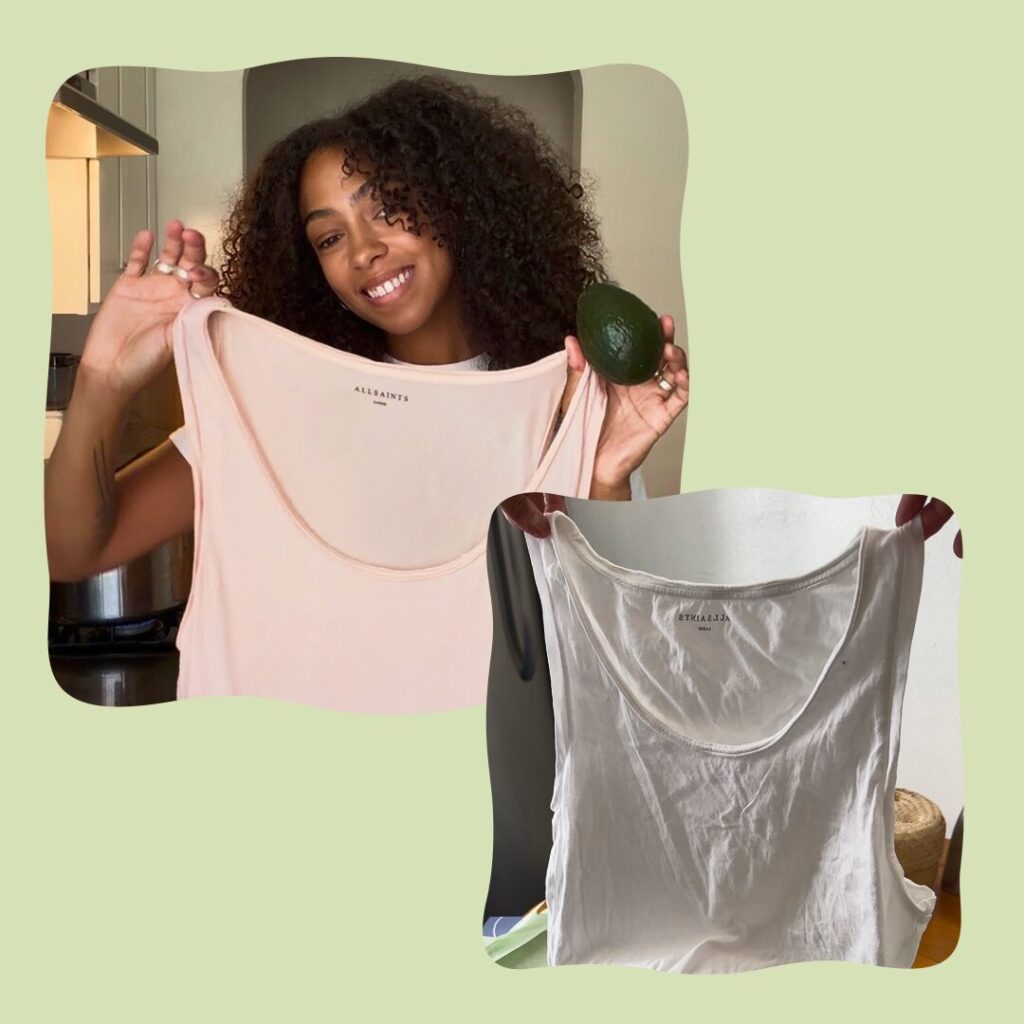
Before that onion skin or avocado pit hits the compost bin, it has one more job to do: turning your thrifted white tee into something you actually want to wear.
Natural fabric dyeing is one of the most satisfying ways to give food scraps a second life. Instead of tossing peels, skins, and pits, you can simmer them into rich, one-of-a-kind color and use it to refresh an old garment, personalize a plain piece, or bring new life to something you found at the thrift store. It’s low-waste, low-cost, and the kind of kitchen project that makes “reduce food waste” feel a lot more fun than it sounds.
We put this to the test ourselves, transforming a 100% cotton top into a soft blush pink using nothing but avocado pits and peels. The top came from our friends at ThredUp, the online thrift store we’ve partnered with because we’re basically in the same business: they rescue clothes that already exist, we rescue food that would otherwise go to waste. They sent over a few secondhand pieces for us to experiment on, which felt like the right starting point. A dye project is a lot more satisfying when the garment has already had one life.
Here’s the video, plus everything you need to know to try it yourself.
Why Dye Clothes with Food Scraps?
Every year, a staggering amount of food gets thrown away before it ever has a chance to be useful, including the parts most of us don’t think twice about tossing: peels, pits, skins, and stems. Natural dyeing gives those scraps a purpose beyond the compost bin, and it’s a small, tangible way to put a “waste less” mindset into practice at home.
Keep Reading: Make Pesto, Not Waste: How to Turn Veggie Scraps into a Delicious Sauce
It’s also just genuinely fun. No two dye baths turn out exactly the same, which means every piece you dye is one-of-a-kind. And unlike synthetic, chemical-heavy dyes, food-based dyes are gentler on your skin, your water, and the planet.
Step 1: Prepare Your Fabric
Natural dye only works its magic on natural fabric. Because plant and food-based dyes bond to natural fibers, you’ll want to start with:
- Cotton
- Linen
- Wool
- Silk
Skip anything that’s majority polyester, nylon, or other synthetic blends. Those fibers won’t absorb the dye, and you’ll end up with a faded, patchy result instead of rich color. This is a great excuse to raid your closet for old cotton tees, linen napkins, or that wool sweater with a small snag, or to check the tags next time you’re thrifting.
Before dyeing, give your fabric a good wash with a small amount of mild detergent to strip away any oils, dirt, or finishing agents that could block the dye from soaking in evenly. Some fibers, particularly cotton and linen, benefit from a “mordant” step, soaking the fabric in a mixture of water and a fixative like salt or vinegar, which helps the color bind to the fibers and stay vibrant through washing. A simple version: simmer your fabric for about an hour in a pot of water with a half cup of salt (for fruit-based dyes) or a half cup of white vinegar (for vegetable-based dyes), then rinse.
Related: 14 Ways to Get Creative—and Save Money—with Food Scraps
Step 2: Make the Dye
This is where your food scraps go to work. The basic method is the same no matter what scraps you’re using:
- Collect your scraps. You’ll want a generous amount, roughly two cups of scraps per one shirt-sized piece of fabric, to get a rich color payoff.
- Simmer. Add your scraps to a pot and cover with double the amount of water. Bring to a low simmer (not a rolling boil) and let it cook down for anywhere from 1 to 6 hours, depending on the scrap. The longer it simmers, the deeper the color.
- Strain. Once the water has taken on a deep, rich hue, strain out the solids, leaving you with your dye bath.
The color you get depends entirely on what’s going into the pot. Here are a few tried-and-true scraps to start with:
- Avocado pits and peels → blush pink. Simmer for up to 6 hours for the deepest color. This is the one we tested ourselves, and the payoff is a soft, rosy pink that gets richer the longer it simmers.
- Yellow onion skins → warm orange and gold. Save skins over a few weeks of cooking until you have a couple of packed cups, then simmer for about an hour.
- Red onion skins → dusty red-brown. Similar process to yellow onion skins, but with a deeper, more muted result.
- Red cabbage → blue-purple. Chop roughly and simmer for about an hour; the resulting dye bath is famously pH-sensitive, so a splash of vinegar can shift it toward pink.
- Beet scraps and peels → rosy red. Simmer beet skins and ends for about an hour for a vibrant, deep pink-red.
- Turmeric → bright yellow. A little goes a long way here; simmer just a tablespoon or two in water for 20-30 minutes for a bold, sunny hue.
- Black beans (dried, soaked) → soft blue-gray. Soak overnight, then simmer the soaking liquid for a subtly cool, blue-gray tone.
- Spinach or beet greens → soft green. Simmer for about an hour for a muted, earthy green.
- Coffee grounds or used tea bags → warm beige and brown. No simmering needed beyond a quick steep; great for an aged, vintage look.
Hungry? Try this Kitchen Sink Egg Bake Recipe.
Step 3: Dye the Clothes
Once your dye bath is ready and strained, and your fabric is prepped:
- Wet your fabric. Dunk your prepared fabric in plain water before adding it to the dye bath. Damp fabric absorbs dye more evenly than dry fabric.
- Add it to the pot. Submerge your fabric fully in the dye bath, making sure it’s not too crowded so the color can reach every part evenly.
- Simmer. Let the fabric simmer in the dye for about an hour, or until it reaches a shade a couple tones darker than your goal color (fabric always lightens slightly as it dries).
- Cool and rinse. Remove the fabric and let it cool before rinsing thoroughly in cold water until the water runs clear.
- Dry and style. Hang to dry out of direct sunlight, then wear your one-of-a-kind, scrap-dyed piece.
A few tips for the best results: wash naturally dyed pieces in cold water and separately for the first few washes, since some color may continue to release. And don’t be afraid to experiment. Layering dye baths, tie-dye folding techniques, or simmering fabric for longer all change the outcome, and that unpredictability is half the fun.
Waste Less, Wear More
Natural dyeing is a small project with an outsized payoff: it keeps scraps out of the trash, breathes new life into old clothes, and gives you a genuinely unique piece you won’t find anywhere else. It’s the same spirit behind why we exist in the first place, finding the good in food that might otherwise go to waste, and putting it to use.
That’s the same reason we teamed up with ThredUp. They’ve built a business on the idea that a garment doesn’t need to be new to be worth wearing, which is the exact argument we make about a lumpy carrot or a crate of blemished peaches. Between the two of us, a dye project like this one is entirely secondhand: scraps that were headed for the compost, clothes that were headed for somebody’s donation pile, and a finished piece that didn’t exist before you made it. You can browse ThredUp’s shop here if you’re looking for a blank canvas of your own.
Looking for another way to put food scraps to work? Check out our guide on how to make natural Easter egg dye for more scrap-powered color inspiration.